chicken.R
import.R
thesis.R8 Workflow in R: Best Practices for Efficient R Programming
Early when learning to program, it is easy to focus on getting our code to work as expected. While this is good, we pay less attention on organizing and styling our code, things which is something that can be learned alongside getting our codes to work. Adopting good programming practices makes our work efficient, easy to follow and understand our logic when we revisit the code, easy for others to reproducible and collaborate with us.
For a comprehensive exposition on good coding practices read the Tidyverse Style Guide.
8.1 Names
Naming is an important part of the coding process, as you will name your scripts, name your variables and name your custom functions. This might be tedious at first but with time you get better giving names. There a few caveat when it comes to naming.
8.1.1 Files
- For scripts, ensure the names are meaningful and end in
.Rextension.
- For names that have more than one words, the words should be separated by
-or_.
# Good
wrangle-data.R
wrangle_data.R
joburg.R
alaves.R
lagos.R- File names should start with names or numbers. Use numbers if your files are modular or organized in a pipeline.
# Good
01_dependcies.R
02_import_data.R
03_clean_data.R- For the internal structure of your file ensure you break your script into sections. A shortcut to do this in RStudio is
CTRL/CMD+SHIFT+R. This command opens up a dialog box to input the section title.
# Load packages --------------------------------------------------------
library(tidyverse)
library(ggthemes)

# Load data ------------------------------------------------------------

# Wrangle data ---------------------------------------------------------
8.2 The R Script
The R script is a file containing R commands. The commands are run sequentially from the top to the bottom of the script. This allows you to break your scripts into sections which can be useful when you share your script to other people as it make them understand what a part of your code do.
8.2.1 Creating an R Script
Opening a New Script: Click the + button in the top-left corner of RStudio and select R Script, or use the shortcut
CTRL+SHIFT+N(Windows/Linux) orCMD+SHIFT+N(Mac).Writing Code: Enter your R commands in the script editor. This might include simple arithmetic, importing your data, cleaning, analysis, and visualization code.
Saving the Script: Save your script by clicking File > Save, or using the shortcut
CTRL+S(Windows/Linux) orCMD+S(Mac).Running the Script: Execute the entire script or selected lines using the Run button or the
CTRL+ENTER(Windows/Linux) orCMD+ENTER(Mac) shortcut.
8.2.2 Benefits of Using R Scripts
- With R scripts instead of console, you can share your work with others
- Scripts allow you to document your entire workflow and reproduce it easily
- Once written, you can reuse your script for similar tasks in the future.
8.3 The R Project
As we continue to progress in our career and increase our use of R in handling different projects, it becomes imperative that we shift focus from solving problems alone to organizing how we solve our problems. Since a lot of research life cycle is almost the same, and the data analysis stage of research almost follows the same pattern, carefully locating each projects which we are working on is key to a stressfree workflow. This is where R projects becomes super important, as it helps us stay organize.
When should you use an R project? For all new projects 🤷. This is the logical thing to do. R projects makes us switch from one project to another without worrying about where the project-specific files are. To see more on why you should work more with projects, read chapter 3 What They Forgot to Teach You About R.
8.4 Creating an R Project
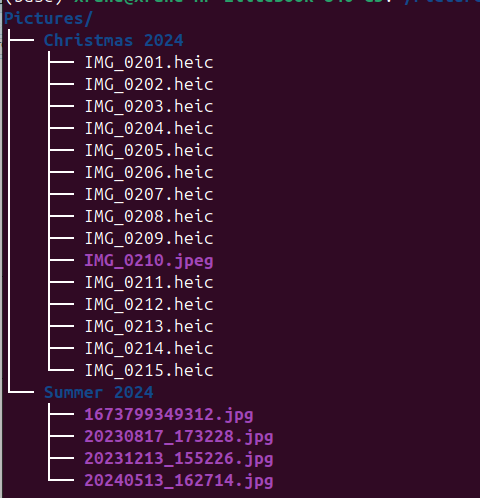
Before we create any project, we need to understand file organizations. Preinstalled with many operating system is the file manager. In file managers, we have some folders created readily, such as Music, Pictures, Videos, Documents, Downloads, and Desktop or Home. These folders ensure we organize our files based on their types and/or purposes. The memorable images we took last christmas is sure to be saved in a pictures folder. If we want to be more organized we can ensure the christmas pictures have it owns dedicated folder within the Pictures folder. A simple diagram of such file organization is shown in Figure 8.1
A similar level of organization is needed when you create R Projects, you can have all your data in a folder, images in another folder, and have another folder housing your R scripts or manuscript.
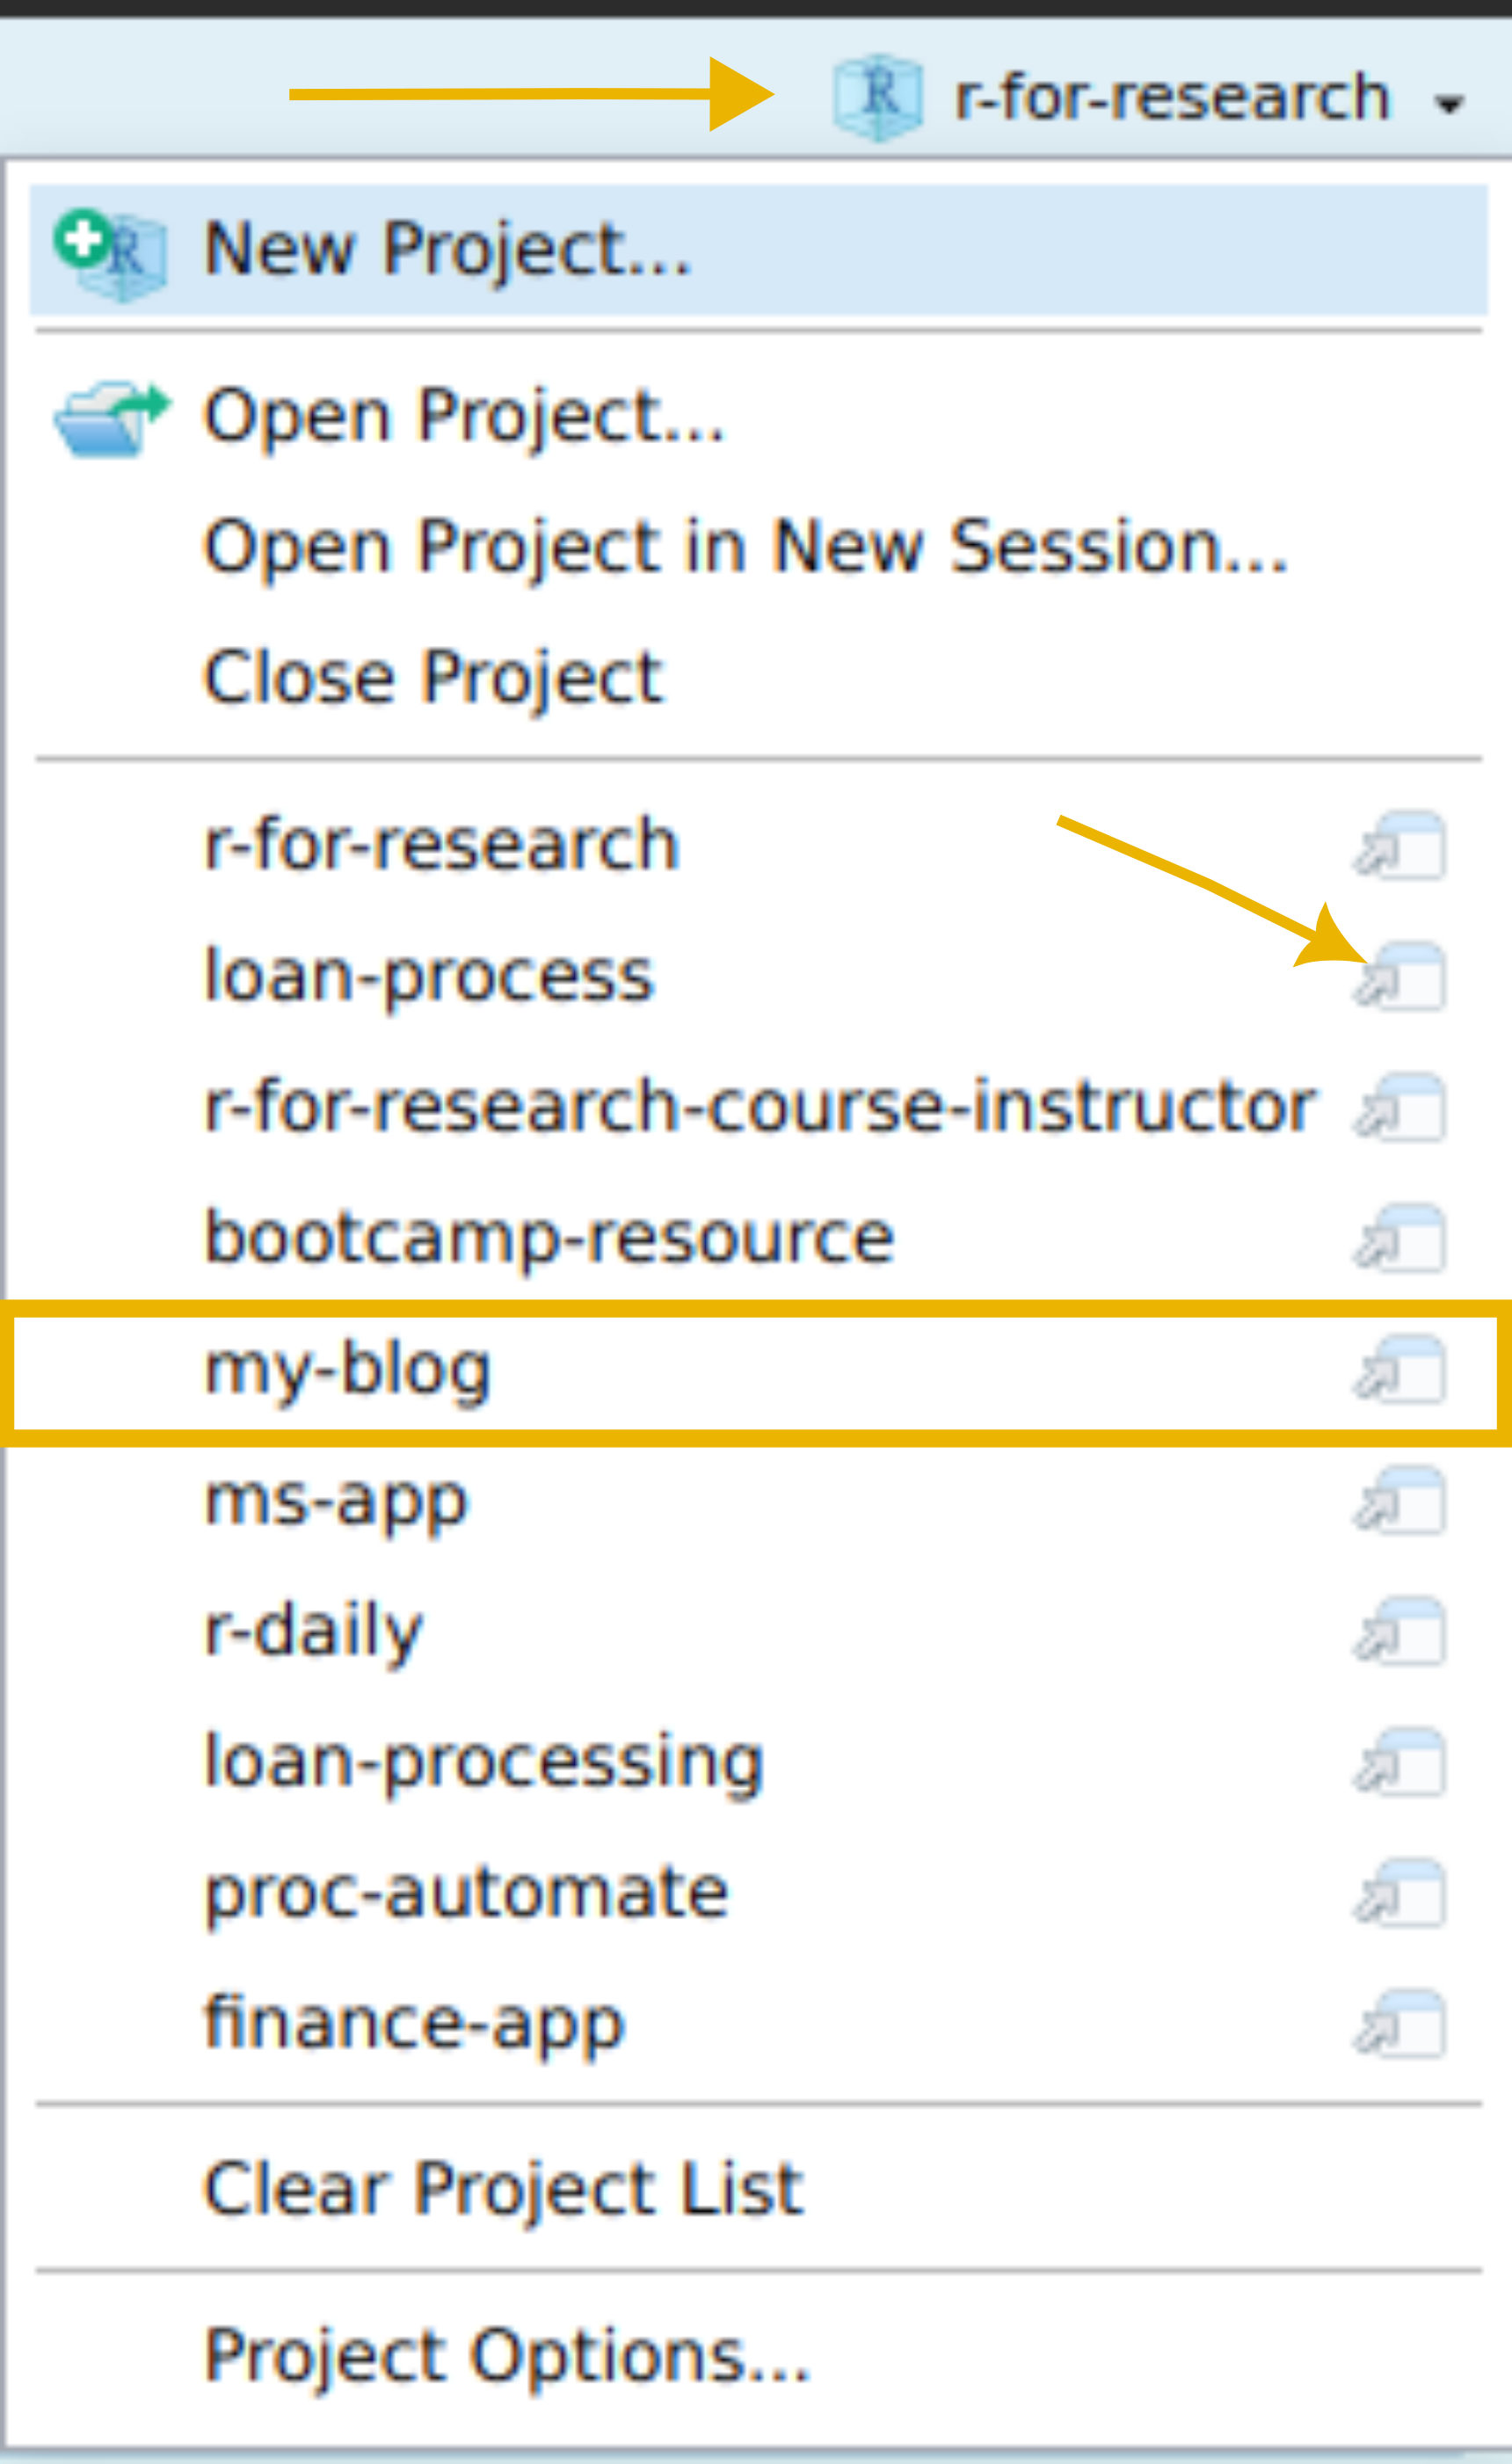
To create a project click on File > New Project on the top-left edge of RStudio. You can create a new directory, use an existing directory, or clone a project from a version control system repository. Alternatively, on the top-right edge of RStudio you will see a drop down button (horizontal arrow) that is like what is shown in Figure 8.2, you can create a new project from there, as well as recent projects (rectangular bar). Using that button also gives you the option to open multiple projects at once by clicking the icon on the edge (second arrow). I tend to use this button a lot, and I think getting used to it saves you a lot of trouble.
Summary
We have cleared the first step to using R effectively and that’s getting the basics down. This chapter shows the first approach towards using R for our research. These are the steps:
- First make use of projects for each project. Using the project button at the right-top edge of RStudio could be useful for this.
- Secondly make use of R scripts. R Scripts ensures your work are usable.
More advanced features like using version control would be covered in part II of this book.

